38 print and cut labels cricut explore air 2
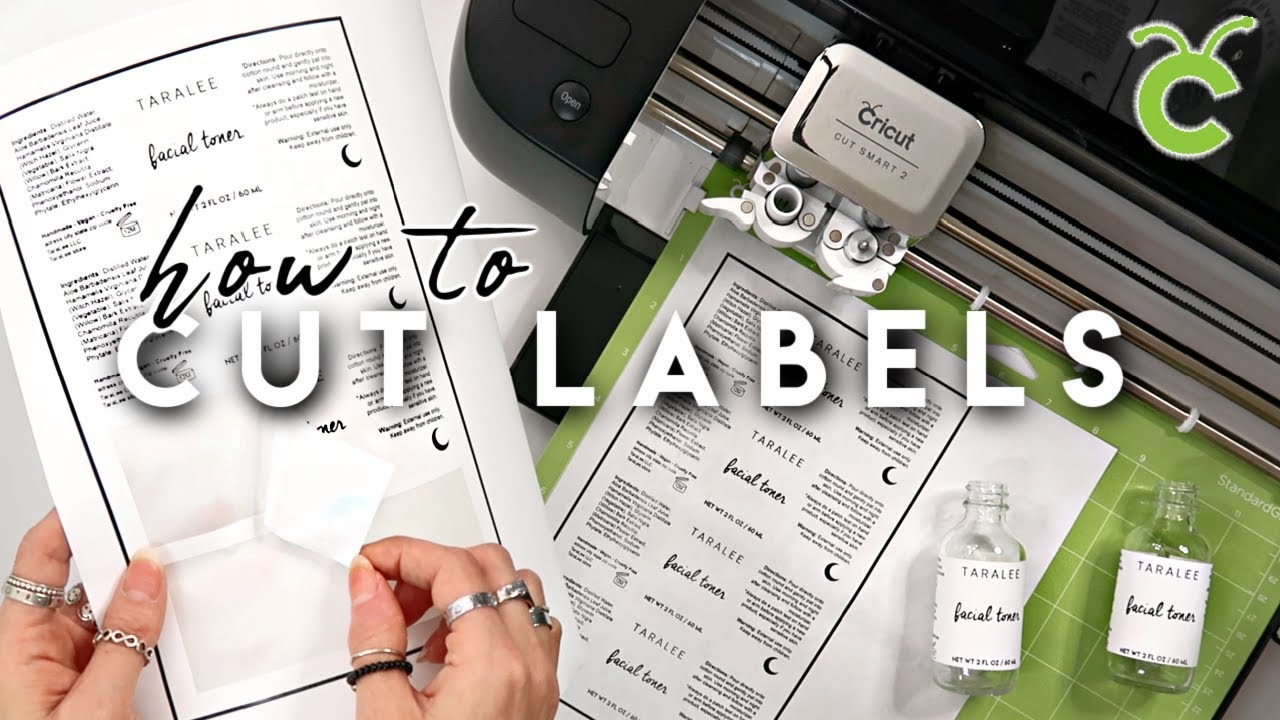
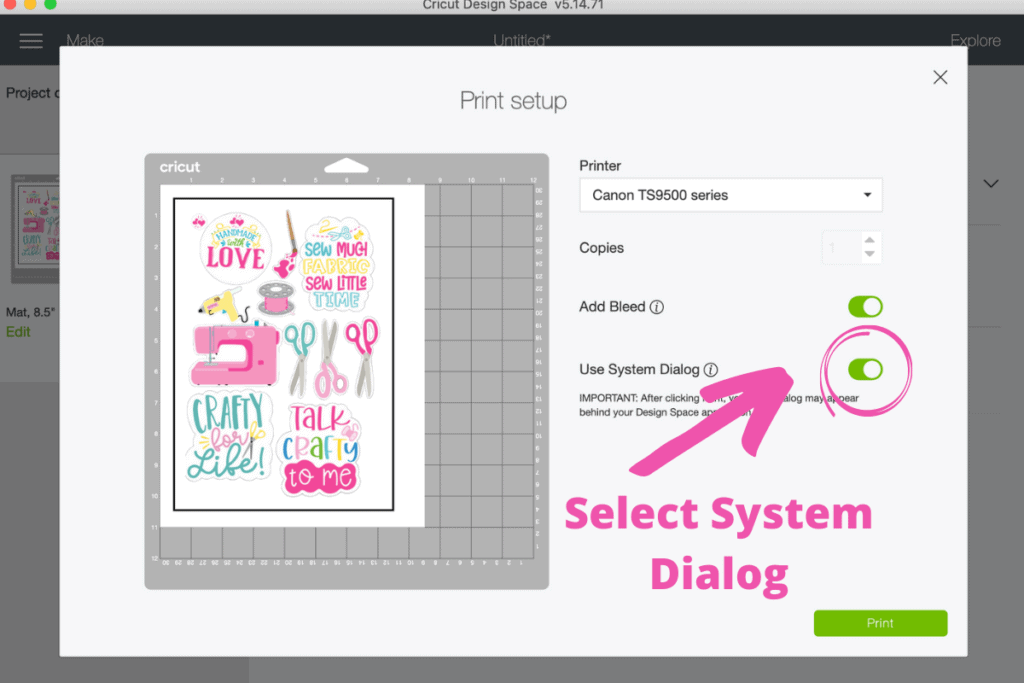
How to Make Stickers Using Cricut Explore Air 2 - SugaBaby Co Cricut Explore Air 2 Sticker Paper Color Printer Light Grip Mat Step 1 Upload your image from external source via PNG file or create an image in Cricut design space. (We love to choose images included with the Cricut subscription) Select the chosen image and add an OFFSET (found in the upper tool bar of design space). Print & Cut Label Tutorial in Cricut Design Space Take the printed page with the black border and place it on your mat. Load it in the machine with the "arrow" button, and Press the "C" button to start the print and cut. When the images are cut, remove the mat and you will have beautiful stickers. Please let me know if you have any questions or if one of the steps is not clear.
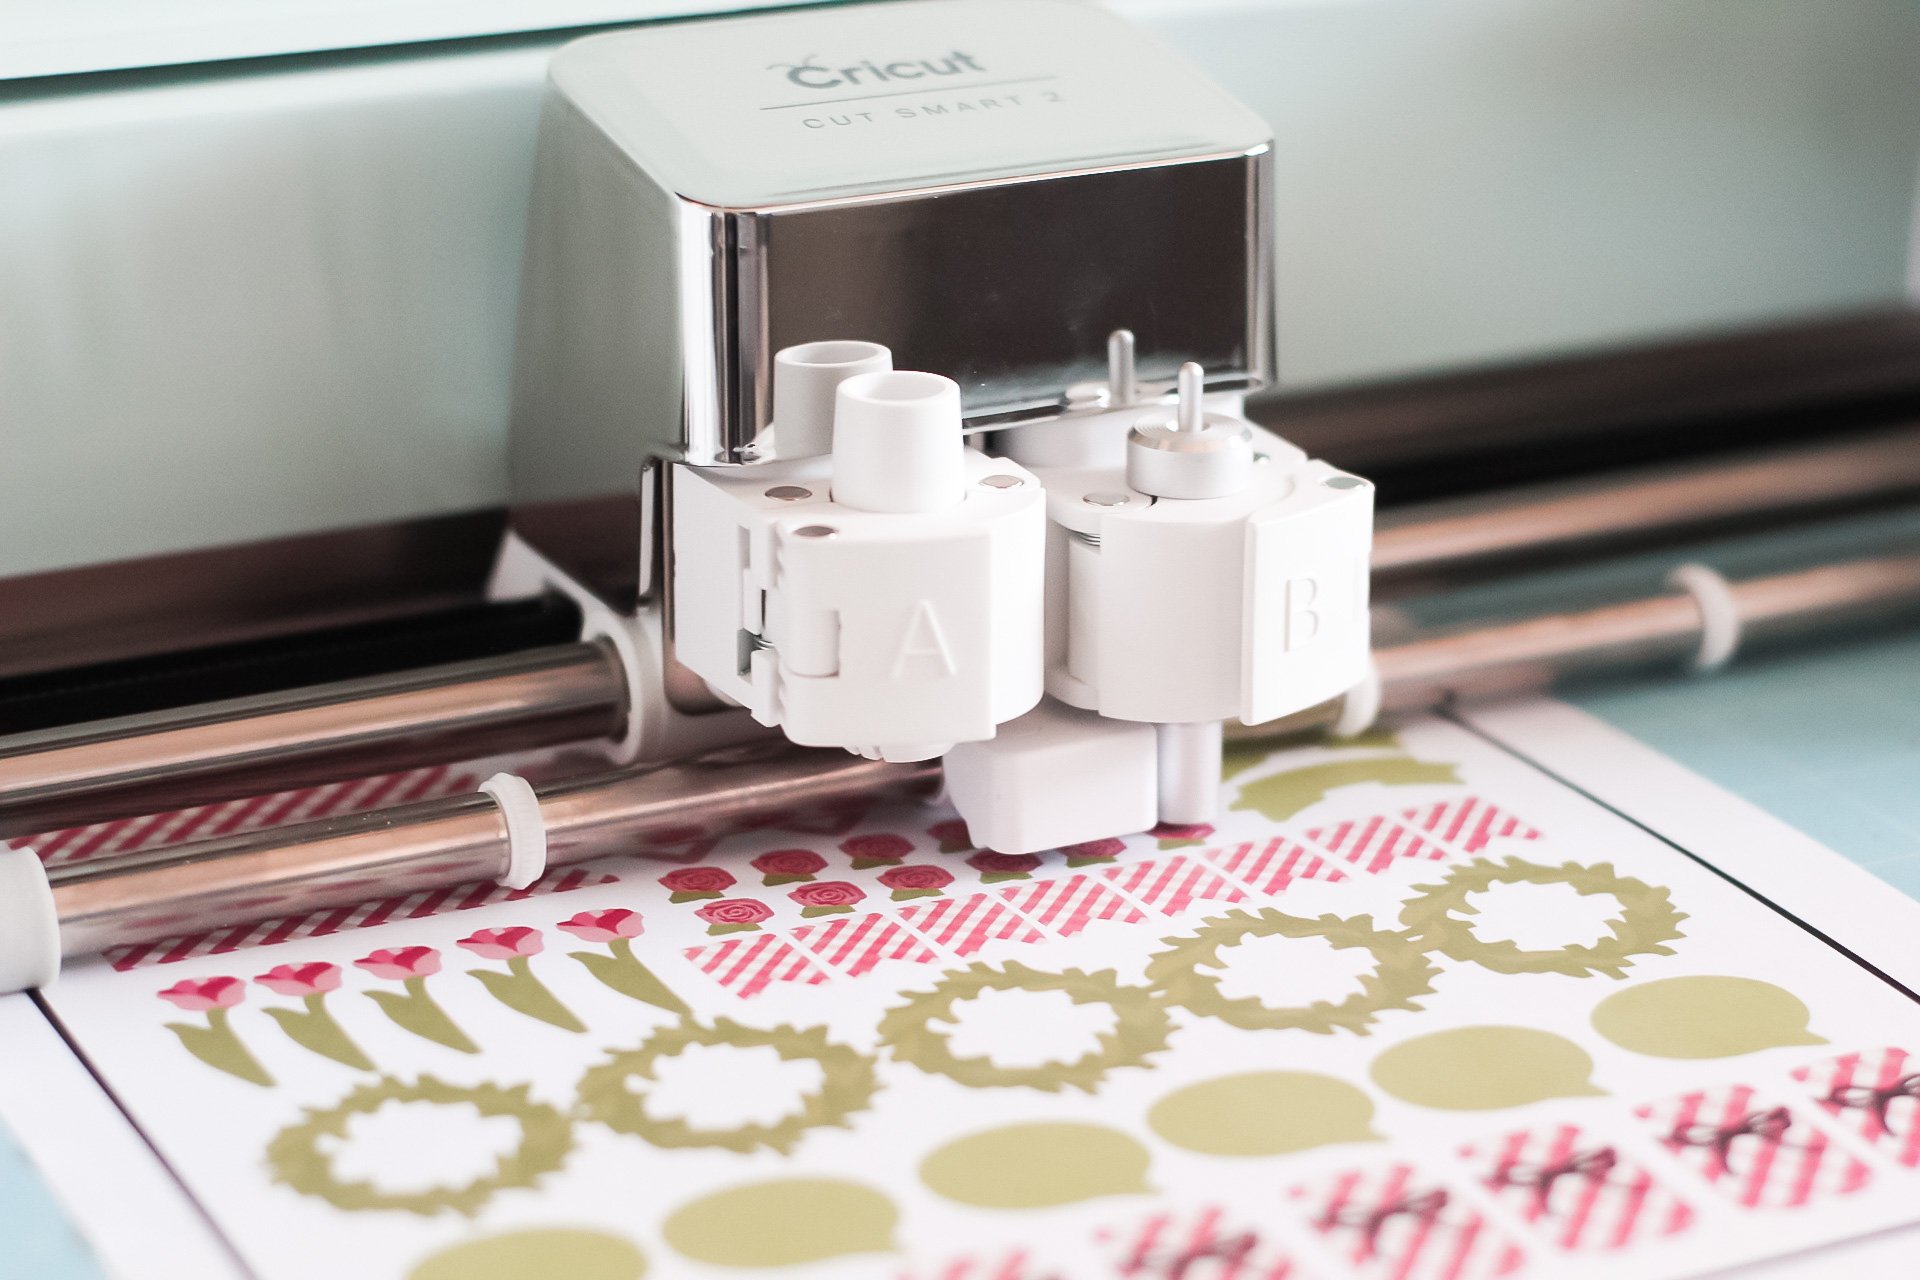
Printable Clear Sticker Paper: Cutting and application instructions Match the top corner of the printed sticker paper (liner side down) to the top left corner of your Cricut LightGrip cutting mat and load into your Cricut Explore or Maker machine. Cut setting: Use the fine point blade (this is the blade that comes installed in the machine). Explore: turn the Smart Set dial to "Custom" and select the ...
Print and cut labels cricut explore air 2
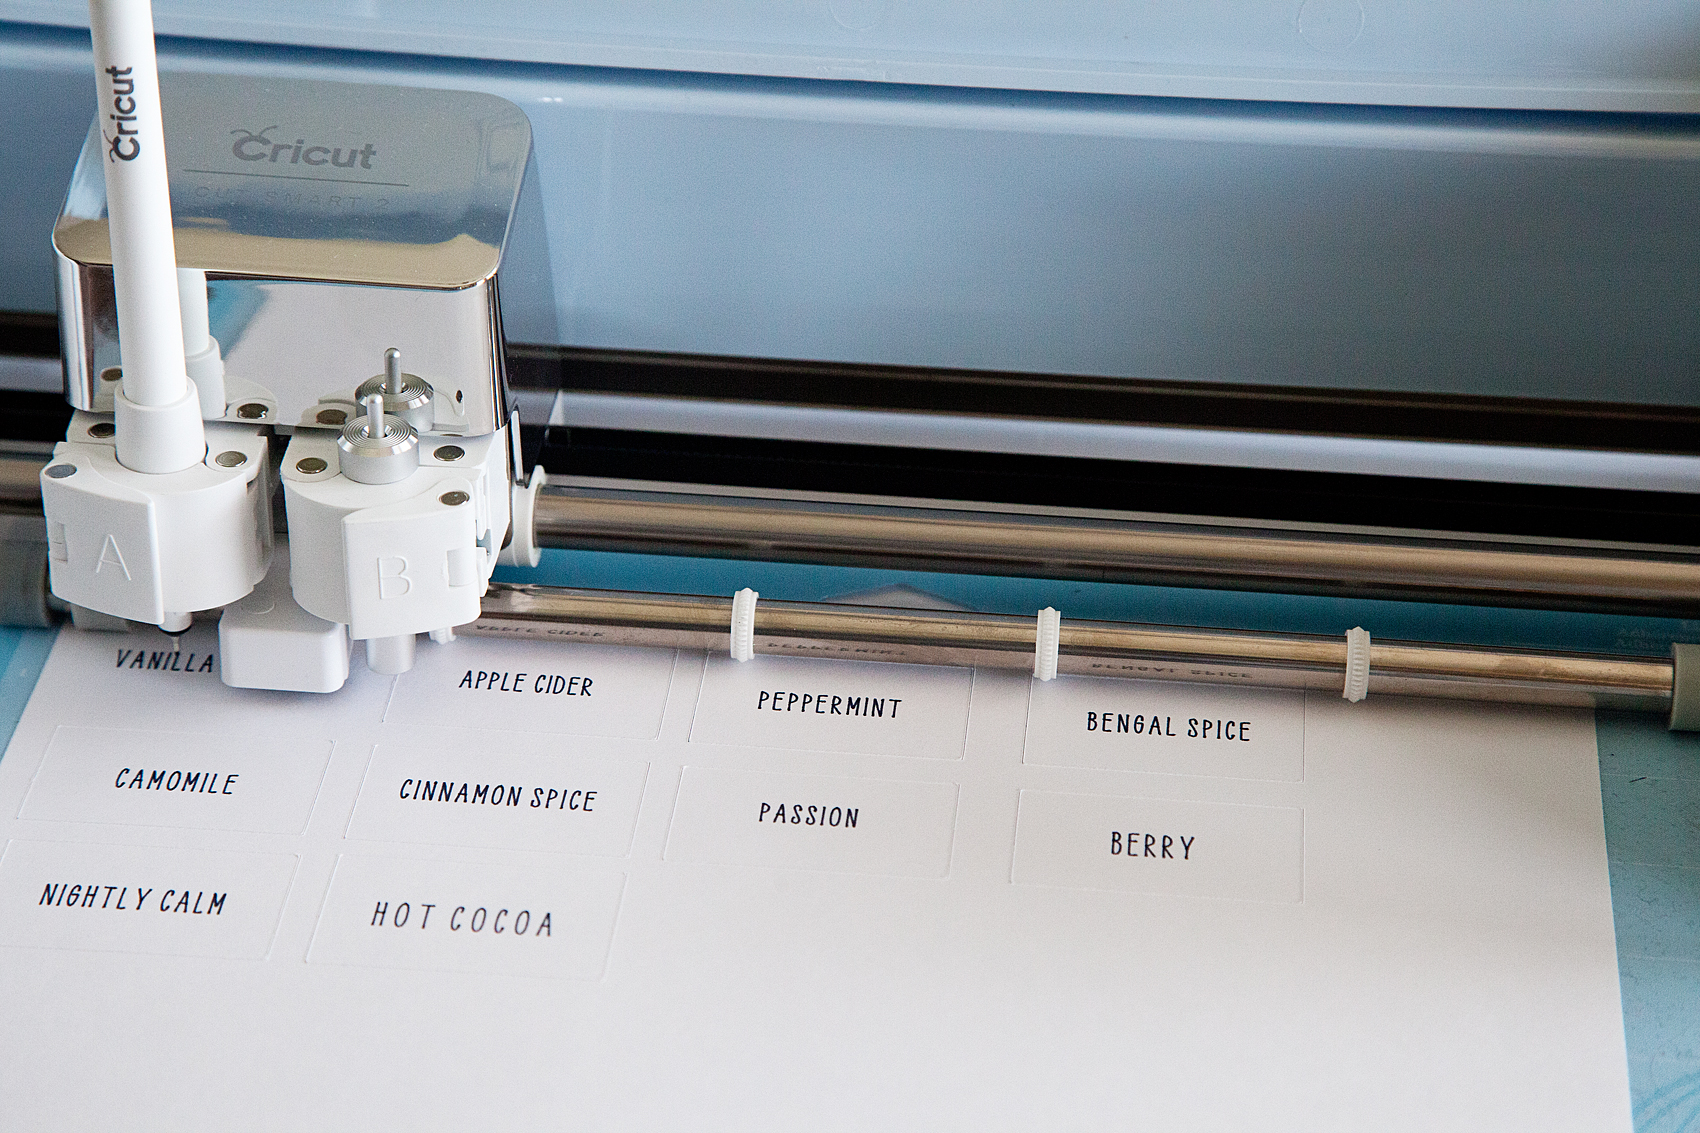
Making Return Address Labels with your Cricut Explore 10. Then select all and attach again. 11. After you hit GO, click "More Mat Settings" and uncheck your bleed setting. You don't need bleed for this project. 12. Then print out your labels and cut! Easy peasy! If you want an even simpler way, just use the write feature for your address instead of the Print Then Cut. How to Write on Tags & Labels With Cricut Pens Once the placement is set, delete out the green square and " Attach " all the label shapes together. In my case, I selected all 9 white squares and clicked "Attach" in the bottom right-hand corner of the screen. Using "Attach" ensures all my squares stay spaced exactly as shown above. Online Labels® Sticker Paper Cut Settings for Cricut Explore Air Our expert crafters have hand-tested the Cricut Explore Air™ with OnlineLabels sticker paper to bring you the exact cut settings for each material. Continue to the chart below to find the cut settings for kiss cut and full cut stickers. Materials were tested on a Cricut Explore Air with the fine-point blade.
Print and cut labels cricut explore air 2. How to Make Vinyl Labels with a Cricut | A Comprehensive Guide What You Need to Make Vinyl Labels on a Cricut. To make vinyl labels on a Cricut machine, here is what you need: A Cricut Machine - You can use this tutorial to make vinyl labels on a Cricut Explore, Cricut Maker, and Cricut Joy (for an in-depth tutorial on the unique labeling techniques available on Cricut Joy, click HERE.); Vinyl - This tutorial will work for all types of vinyl including ... Printable Labels with Print then Cut on Your Cricut Machine Then put it in your Cricut Explore Air 2 once prompted. Be sure to turn your dial to custom and pick printable vinyl from the custom materials list. The machine will first find the edge then it will cut each of your labels. You are left with perfectly cut labels that can be used on any project! Step 4: Covering Boxes in Vinyl How to Make Vinyl Labels with a Cricut Cutting Machine Label Project in Cricut Design Space. Step 2- Create your design. If you are using a Cricut machine, you can find my exact project in Cricut Design Space here. To design my labels, I used a Cricut font called Balega Std Regular. I measured the bins I was labeling to figure out the best size, and I ended up using 55 pt font for my project. A Guide To Making Labels with Cricut Print Then Cut Step 4: Cut Out the Labels with Your Cricut Machine With your labels printed, load the paper onto a green StandardGrip cutting mat, aligning the top lefthand corner of the paper with the top lefthand corner of the mat's grid. Load the mat into your Cricut machine and press the Go/Start button.
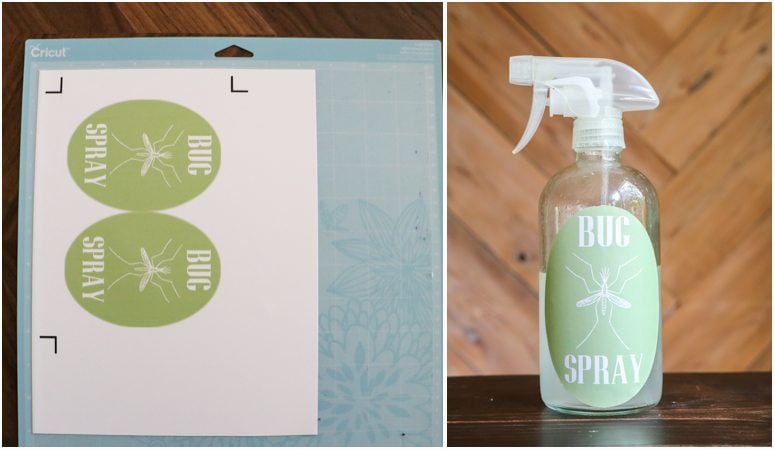
How to Make Kiss Cut Sticker Sheets with Cricut I keep my sticker sheets relatively small so I can fit two on a page. I use the Cricut Explore Air 2, so my maximum cutting size is 9.25″ x 6.75″. This means my sheets need to be around 4.5" x 6.5" to leave a space between them for cutting purposes. Setting the sticker sheet up in Cricut Design Space. To begin, open the Cricut Design app. Print then Cut Stickers with the Cricut Explore Air 2 Here is how to print then cut stickers on your Cricut Explore Air 2 Materials Needed Cricut Sticker Paper Cricut Markers Directions In Cricut Design Space, insert image and search for cat clip art. Then add the image to your new file. With the cat selected, change the icon from print to write and select the colors you want the cat to be. How To Use Cricut Print Then Cut / DIY Labels and Stickers In today's video you will see how easy is it to use Cricut's print then cut feature to make labels. I use it today to make some labels for strawberry jam. I also use this feature a lot to... 25+ Easy Cricut Explore Air 2 Projects for Beginners (2021 ... Jul 21, 2021 · Cricut released their all-new Explore 3 model in June 2021, nearly 5 years after the Cricut Explore Air 2. Many of the features are the same, but there are some key differences between the models. The 2021 model can use Cricut Smart Materials, which allows a continuous cut up to 13″ wide and 12 feet long without the use of a mat.
Shop by Category | eBay Shop by department, purchase cars, fashion apparel, collectibles, sporting goods, cameras, baby items, and everything else on eBay, the world's online marketplace Print and Cut Labels - Cricut Maker - YouTube Learn how to use the print and cut feature to create clear labels/ stickers.Affiliate Links:Amazon:Silhouette Clear Sticker Paper: ... Aerocity Escorts & Escort Service in Aerocity @ vvipescort.com Aerocity Escorts @9831443300 provides the best Escort Service in Aerocity. If you are looking for VIP Independnet Escorts in Aerocity and Call Girls at best price then call us.. Cricut Explore Air 2 : Amazon.ca: Home Cut and write faster and more precisely with the Circuit explore air 2. This cutting edge DIY machine was designed to bring joy to you and others as you create projects with a personal touch. With this machine you're able to upload your own images for free, select from the 3, 000 ready-to-make projects, or create on your computer, tablet, or ...
How to Make Product Labels using Cricut Explore Air 2
Cricut Explore Air 2 | Cricut Shop The ultimate smart cutting machine, works with 12+ tools Starting at $399.99 Comparison Chart Find the machine that's perfect for you! Cricut Access™ Exclusives; Heat Presses. Shop by Cricut EasyPress. EasyPress 12x10 ... Cricut Explore Air 2. 11 of 11 Results

Free Thank You Stickers PNG with Print and Cut Tutorial ...
Cricut.com/setup - Download and Install Cricut Explore Setup Currently, there are three most popular Cricut devices: Cricut Maker 3, Cricut Explore Air 2, and Cricut Joy. The Cricut Explore 3 is one of the best-selling machines and is often recommended to mid-level craft players. And the Cricut Maker 3 version is one step up ahead of the Explore 3 machine.
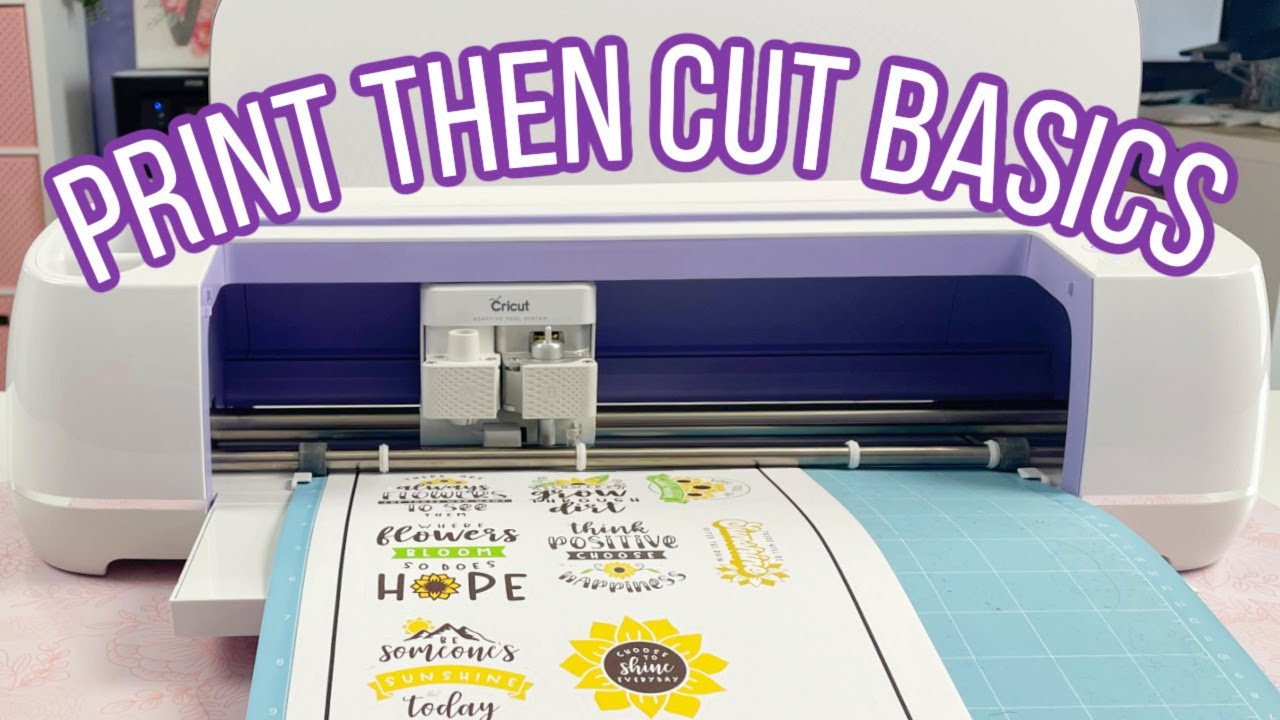
Print Then Cut Basics Tutorial with Cricut Maker or Cricut Explore Air 2
How to Print and Cut Round Stickers on the Cricut Go to Design Space at Click New Project Click the Upload button Browse, find, and upload the sticker file On the next screen, under "Select Image Type," choose Simple then click Continue. On the next screen, just click Continue. On the next screen, keep it selected as "Save as print then cut image" then click Save.
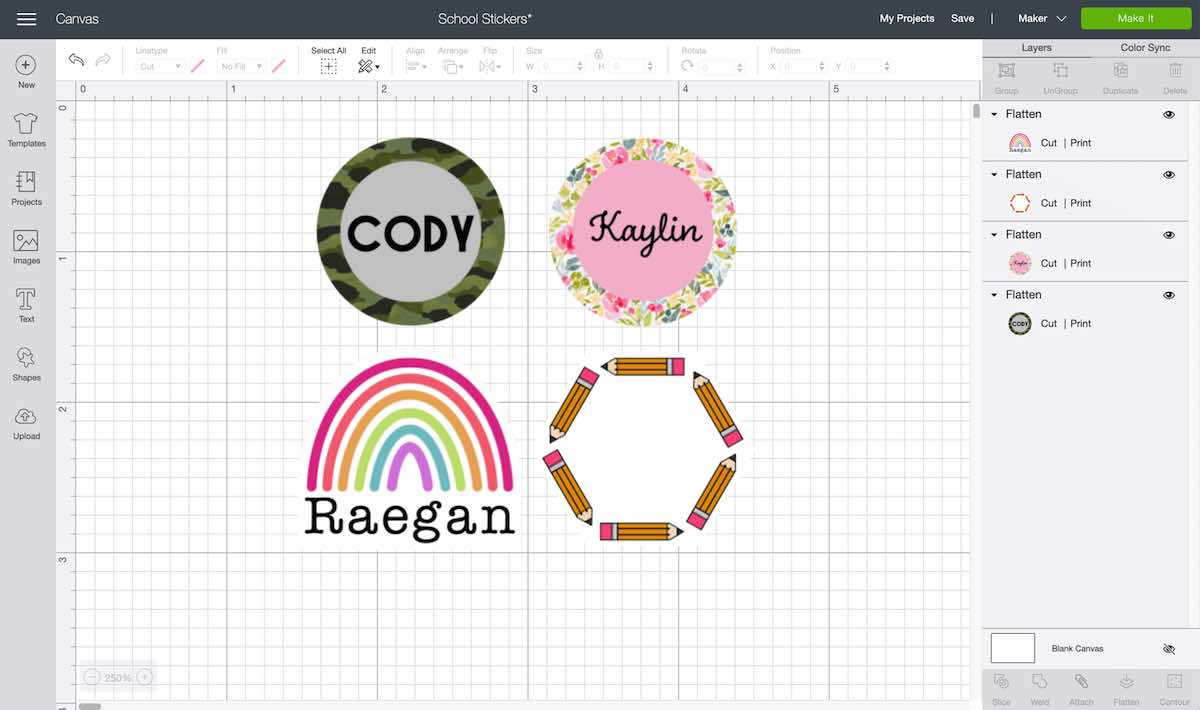
How to create personalized stickers for back-to-school – Cricut
Print Then Cut: DIY Baby Closet Dividers with the Cricut Explore Air 2 You'll print out the design first (print out all four pages, make sure ' Add Bleed ' is selected), and cut on LightGrip blue mat. If You're Designing Closet Dividers Yourself In Design Space… Open up your Cricut Design Space application on your phone or desktop. Click on ' Image ' in the left toolbar, and search for ' door hanger '.
How to Make Stickers and Labels with a Cricut Machine ...
PDF How to make labels on cricut explore air 2 - ihdbd.org they can make without the specialty tools and materials of the other two newer machines. The answer is a resounding yes! Your Cricut Explore Air 2 is a remarkably versatile cutting machine. It can cut more than 100 materials using three different blades. You can make so many things! Let's start with some other posts that Cricut Explore Air 2
The Best Sticker Paper for a Cricut - Angie Holden The ...
How To Use Cricut Print And Cut With Printable Vinyl - DIY Stickers! 11. Now it's time to cut them out. To do this you'll need to set the dial on your Cricut Explore machine to 'custom' and click 'browse all materials'. Type in 'printable' and printable vinyl will appear. Select it and click 'continue'. 12. Place your printable vinyl backing paper side down on your Cricut mat.
10 Fun Projects to Make with Your Cricut Explore Air 2 - 100 ...
cricut explore air 2 stickers |Cricut| ETSY| Print then cut| Sticker ... In this video, I will teach you how to make stickers from home. This technique results in professional kiss cut or die cut stickers. I use photoshop and a Cr...
The Best Sticker Paper for a Cricut - Angie Holden The ...
How to Make Product Labels using Cricut Explore Air 2 #cricutmade ⭐️ SHOP CRICUT EXPLORE AIR 2 blue - EXPLORE AIR 2 green - EXPLORE AIR 2 mint - http:/...
Cricut Print Then Cut Stickers Tutorial | Sweet Red Poppy
How to make labels with Cricut - Cricut Step 1 To design from scratch, click "New Project" on the home page of Cricut Design Space. Step 2 Once on the canvas, on the left-hand navigation bar, you'll see an option for "Images." Step 3 Click that button. You'll now be able to search in the Cricut image library! We filtered our search by "image sets" and searched for "Pantry Label."
Cricut Print Then Cut Tutorial: Easy DIY Stickers - Slay At ...
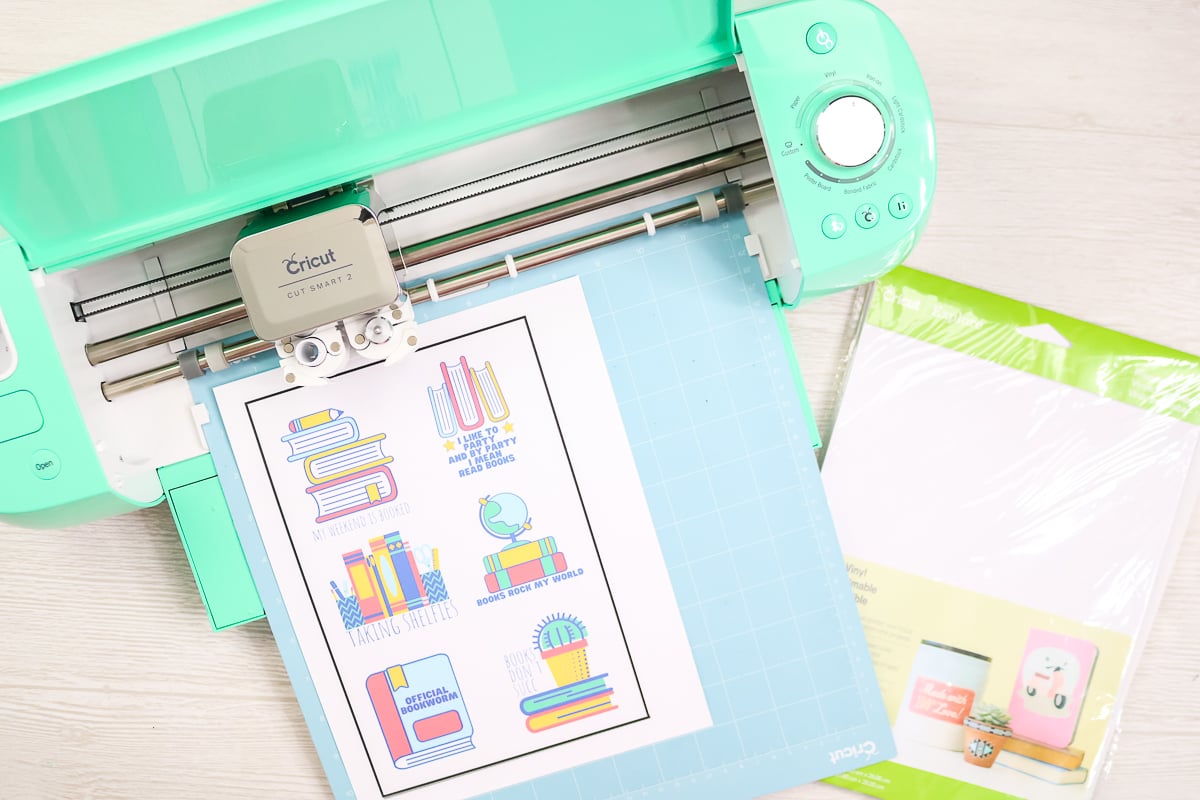
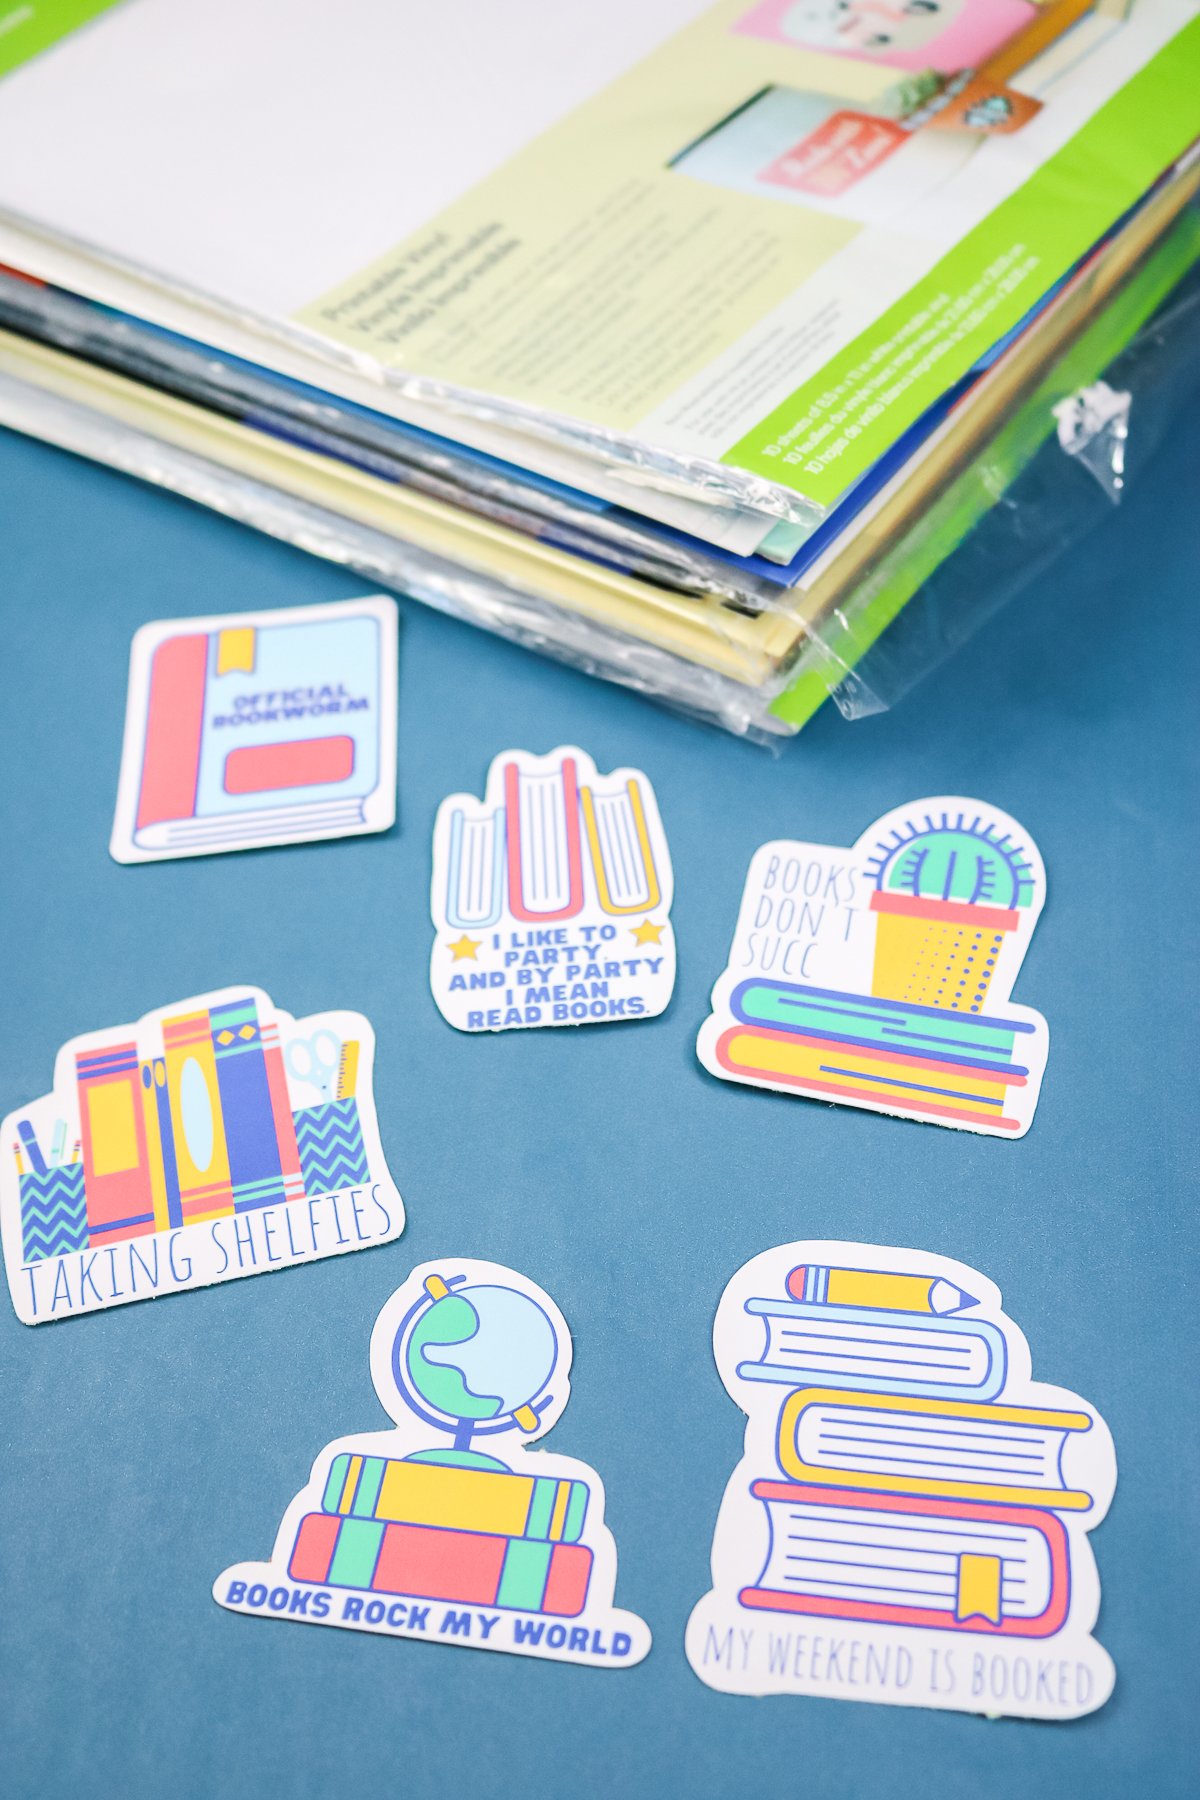
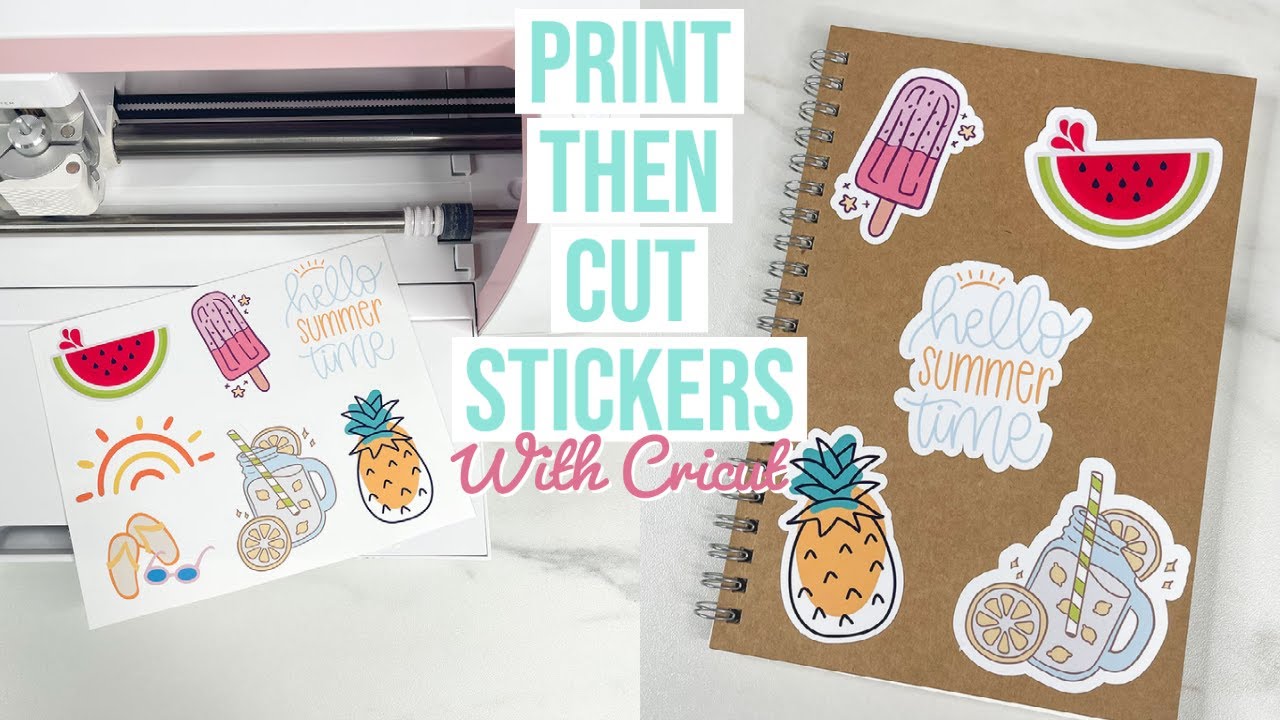
Print Then Cut: How To Make DIY Stickers With Cricut Explore Air 2 By choosing to flatten our images, we are creating just ONE layer to print and then cut. Print Then Cut Your Design At the time of this writing, Cricut Print Then Cut designs need to be within the dimensions of 6.75″ and 9.25″, and printed onto a standard size piece of paper (or in this case sticker paper) that measures 8.5″ x 11″.
25+ Easy Projects You Can Make with the Cricut Explore Air
Amazon.com: cricket machine IMAGINING Dust Cover with Zipper Pocket Compatible with Cricut Maker, Explore Air 2 and Accessories, Scrapbooking Die-Cut Machine Covers Organizer Cricut Accessories (Pink) 4.7 out of 5 stars 560 $13.99 $ 13 . 99

Introducing My Cricut Explore Air 2 and Name Sticker Tutorial
Amazon.com: Cricut Explore Air 2 Machine Bundle with Iron On ... Mar 15, 2017 · Make personalized gifts, home decor, indoor decals, wall signs, drinkware, customized T-Shirts, baseball caps, shoes and pillows. Pen Set writes messages for envelopes, paper invitations, labels, and gift tags. Cricut Explore Air 2 die-cutting machine can cut through a variety of materials from paper and iron-ons to felt and lightweight leather.

How To Use The Print And Cut Feature In Cricut Design Space ...
Print and Cut with Cricut Explore Air 2 - YouTube Create this mini mother's Day banner using the free file download at and using the p...
3 Creative Ways to Make Labels with a Cricut - The Homes I ...
How to Make Stickers with Cricut Explore Air 2 - Print On Demand World Go to the Cricut Design Space App and open a new canvas 2. Upload your saved sticker file, adjust the paper's size and print it 3. Place your printed project over the mat, and just let the machine do the final cutting Well, does it sound exciting?

How to Make Stickers with Cricut "Print then Cut" - Sarah Maker
Complete Print Then Cut Cricut Guide - Analytical Mommy LLC When you want to Print then Cut something using your Cricut machine, it's key to setup the design correctly in Design Space. There are two things that you must make sure you do: You must switch the "Operation" option to "Print then Cut >> Standard" itch setting from "cut" 2. Then you need to click "Flatten" on the bottom right.

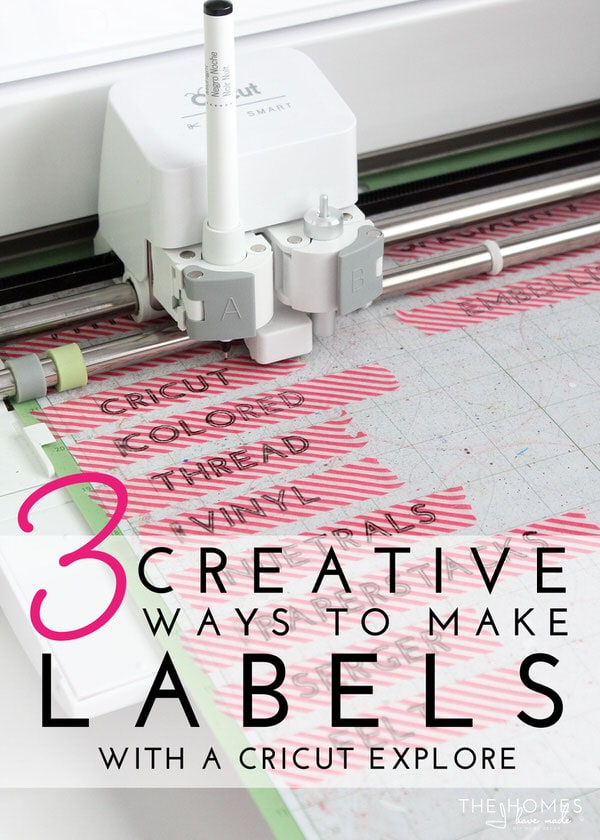
Print & Cut Label Tutorial in Cricut Design Space - Crafting ...
How to Use Cricut Print And Cut With Avery Transfer Sheets You need to press "Save as a Print Then Cut image" and then click "save". 5. After you have saved your image, you can now upload it to your canvas in Design Space. Select the cactus image and click "insert image". Now that you're image has been inserted, let's add some text and resize the image so that it will fit on a onesie.
HOW TO MAKE PRINT THEN CUT STICKERS WITH CRICUT
Online Labels® Sticker Paper Cut Settings for Cricut Explore Air Our expert crafters have hand-tested the Cricut Explore Air™ with OnlineLabels sticker paper to bring you the exact cut settings for each material. Continue to the chart below to find the cut settings for kiss cut and full cut stickers. Materials were tested on a Cricut Explore Air with the fine-point blade.

Cricut 2002530 Printable Sticker Paper for sale online | eBay
How to Write on Tags & Labels With Cricut Pens Once the placement is set, delete out the green square and " Attach " all the label shapes together. In my case, I selected all 9 white squares and clicked "Attach" in the bottom right-hand corner of the screen. Using "Attach" ensures all my squares stay spaced exactly as shown above.

When to use Flatten to Print and Cut - NeliDesign
Making Return Address Labels with your Cricut Explore 10. Then select all and attach again. 11. After you hit GO, click "More Mat Settings" and uncheck your bleed setting. You don't need bleed for this project. 12. Then print out your labels and cut! Easy peasy! If you want an even simpler way, just use the write feature for your address instead of the Print Then Cut.

Fields Of Heather: Solving Common Print Then Cut Problems

Print Then Cut FAQ's + Free Printable Downloads - Kayla Makes

How to Make Vinyl Labels with a Cricut Cutting Machine | Abby ...

25+ Easy Cricut Explore Air 2 Projects for Beginners (2021 ...

How To Make Stickers And Decals With Cricut - Organized-ish
Cricut Print Then Cut Stickers Tutorial | Sweet Red Poppy

five sixteenths blog: Tips for Cricut Explore Print then Cut ...

Make Personalized Back to School Supplies - Pineapple Paper Co.

Cricut Printable Vinyl | Sticker Paper | DIY Decal and Stickers Bundle | Custom Journal Scrapbook Stickers Kit

Cricut Materials Guide: What Materials Can You Cut?

Cricut Hack to Save Paper for Print Then Cut Images · Crafty ...
Create Handwritten Labels by Cricut - WhipperBerry
How to Make Waterproof Die Cut Stickers on Your Cricut : 7 ...
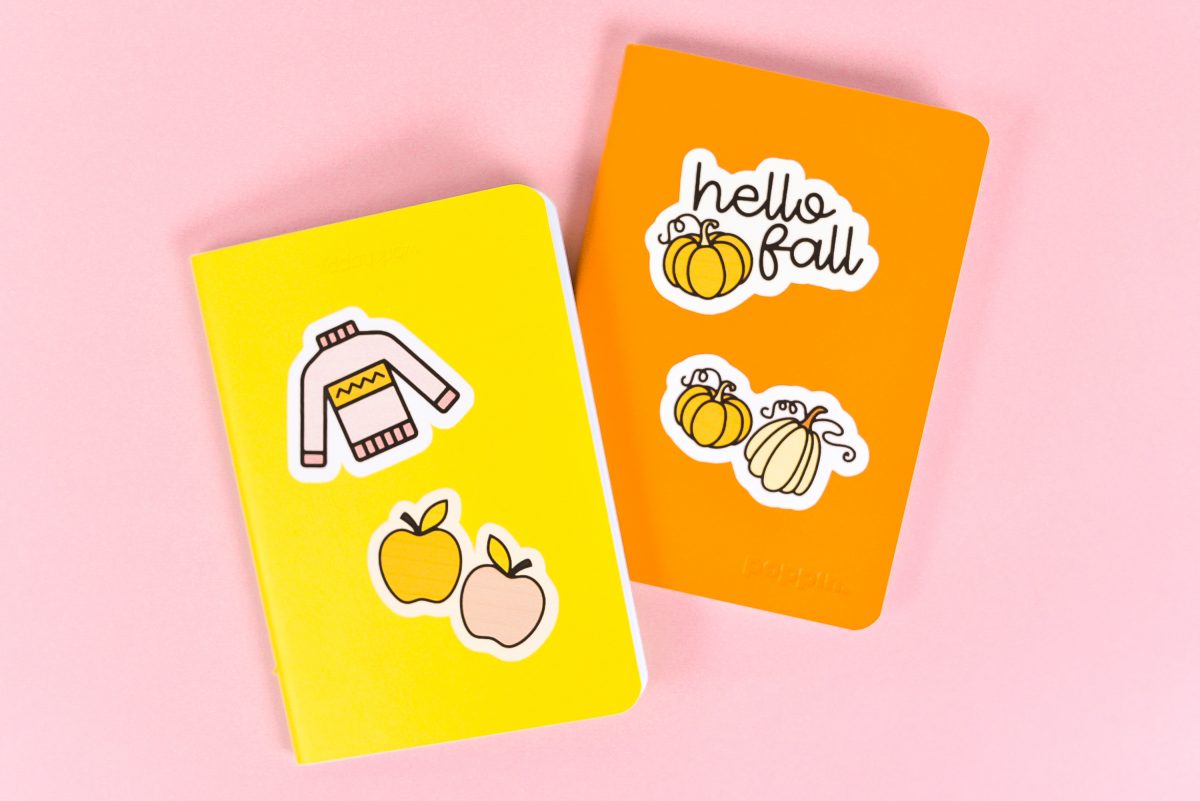
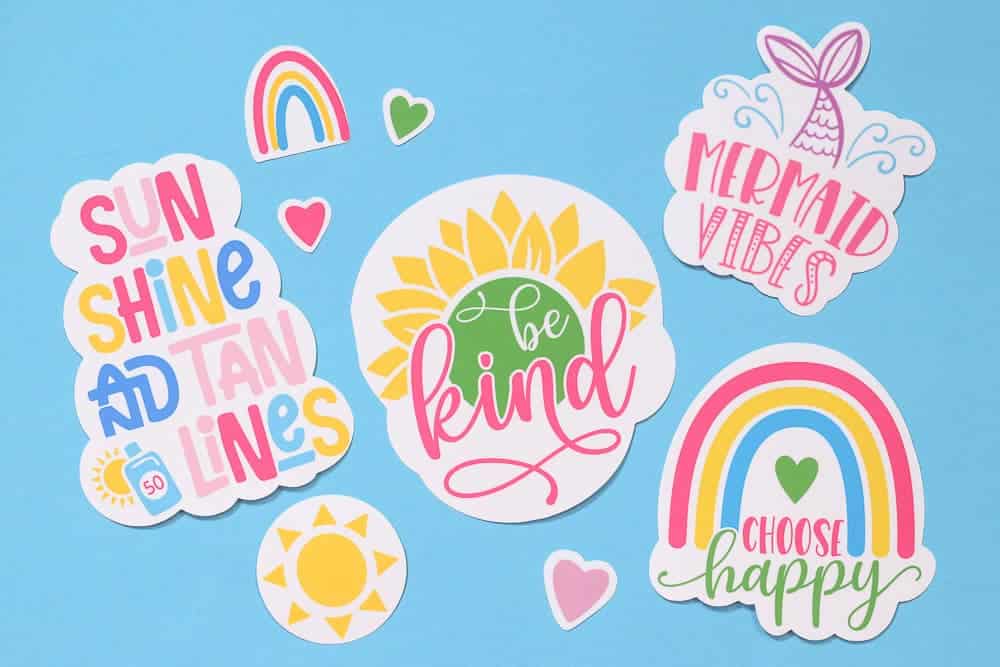
Cricut Print then Cut Fall Stickers - Hey, Let's Make Stuff

How to Cut Printable Planner Stickers with a Cricut Explore ...
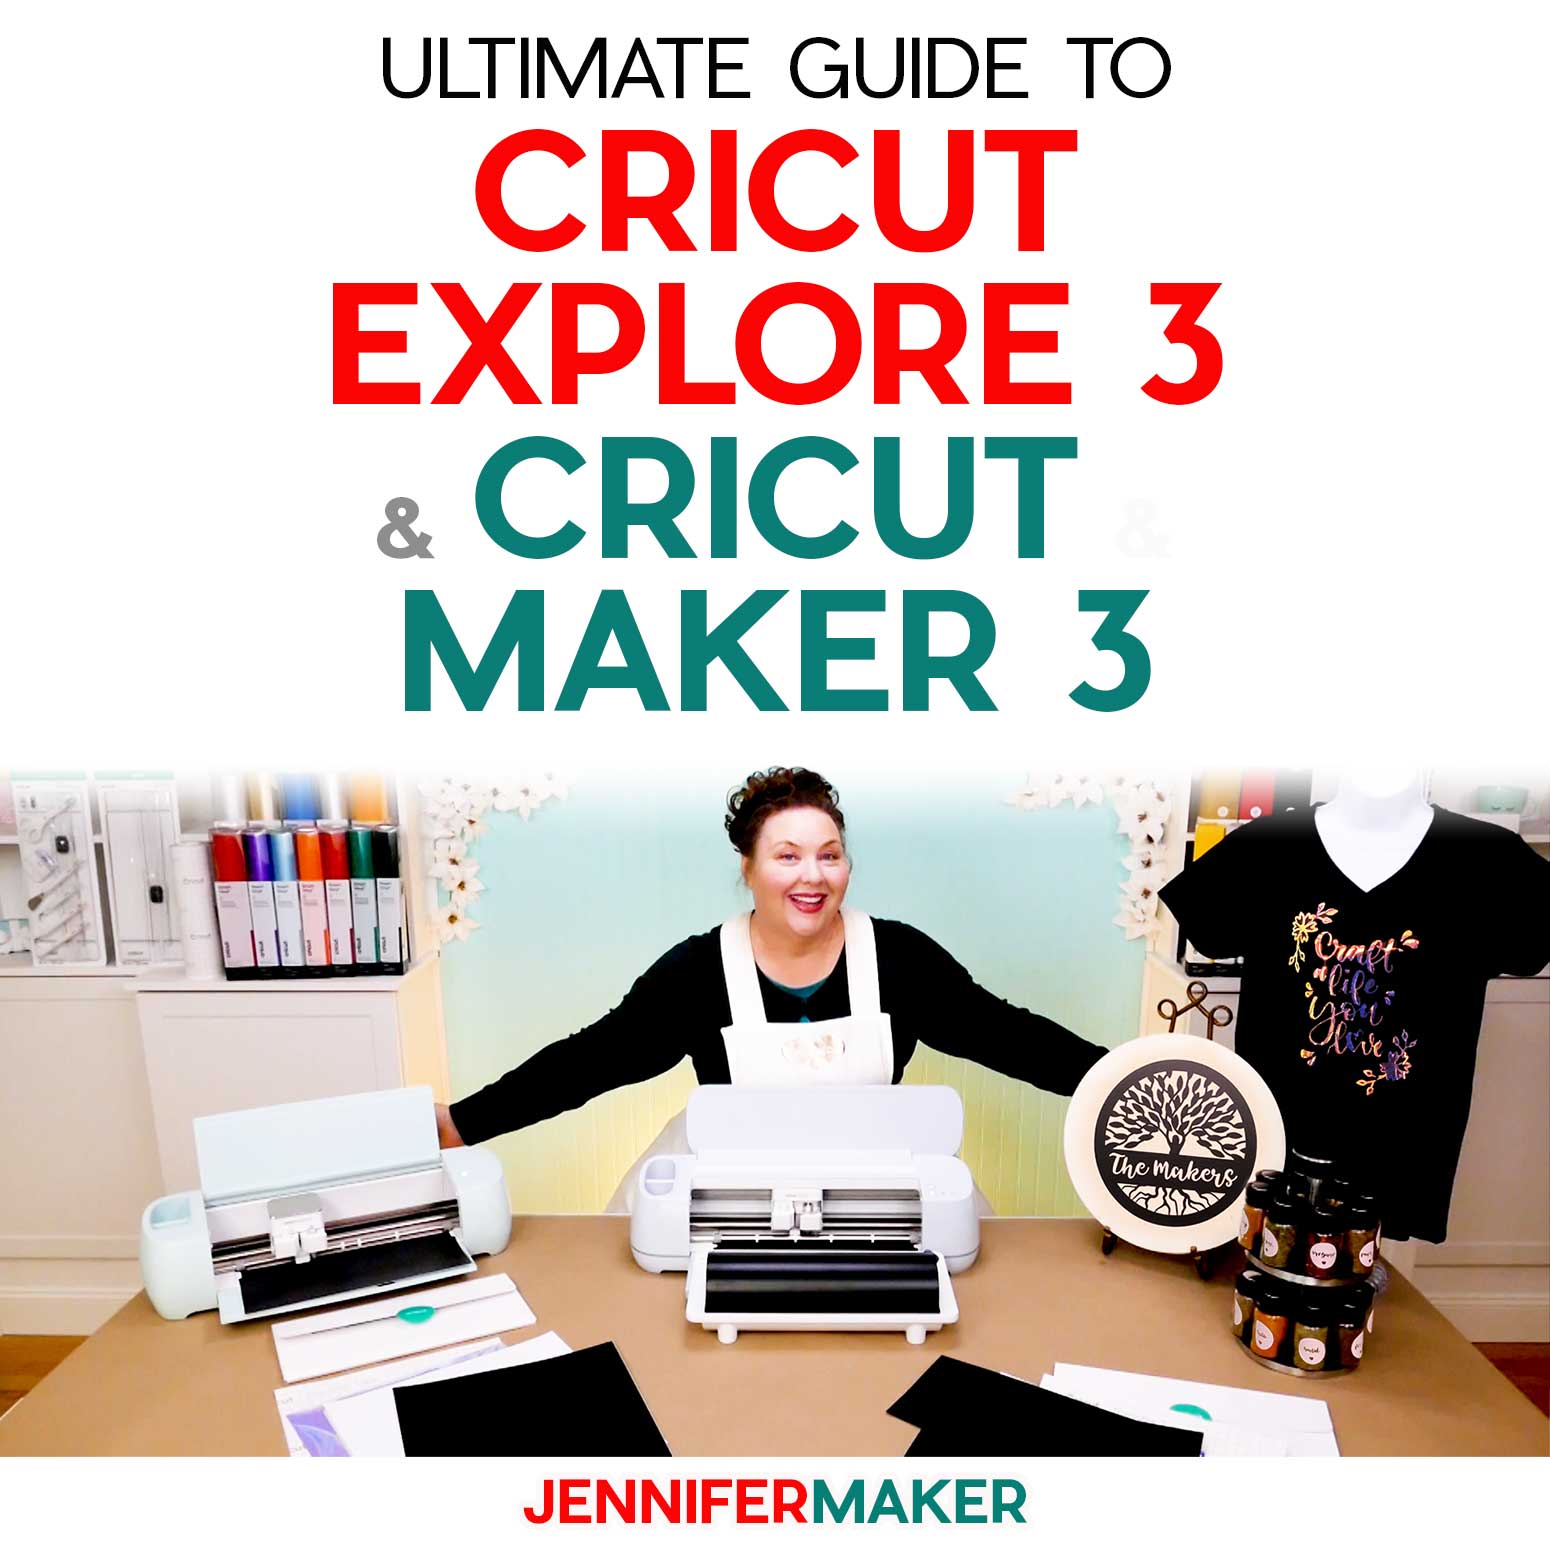
Cricut Explore 3 & Maker 3: Ultimate Guide to Cricut's New ...
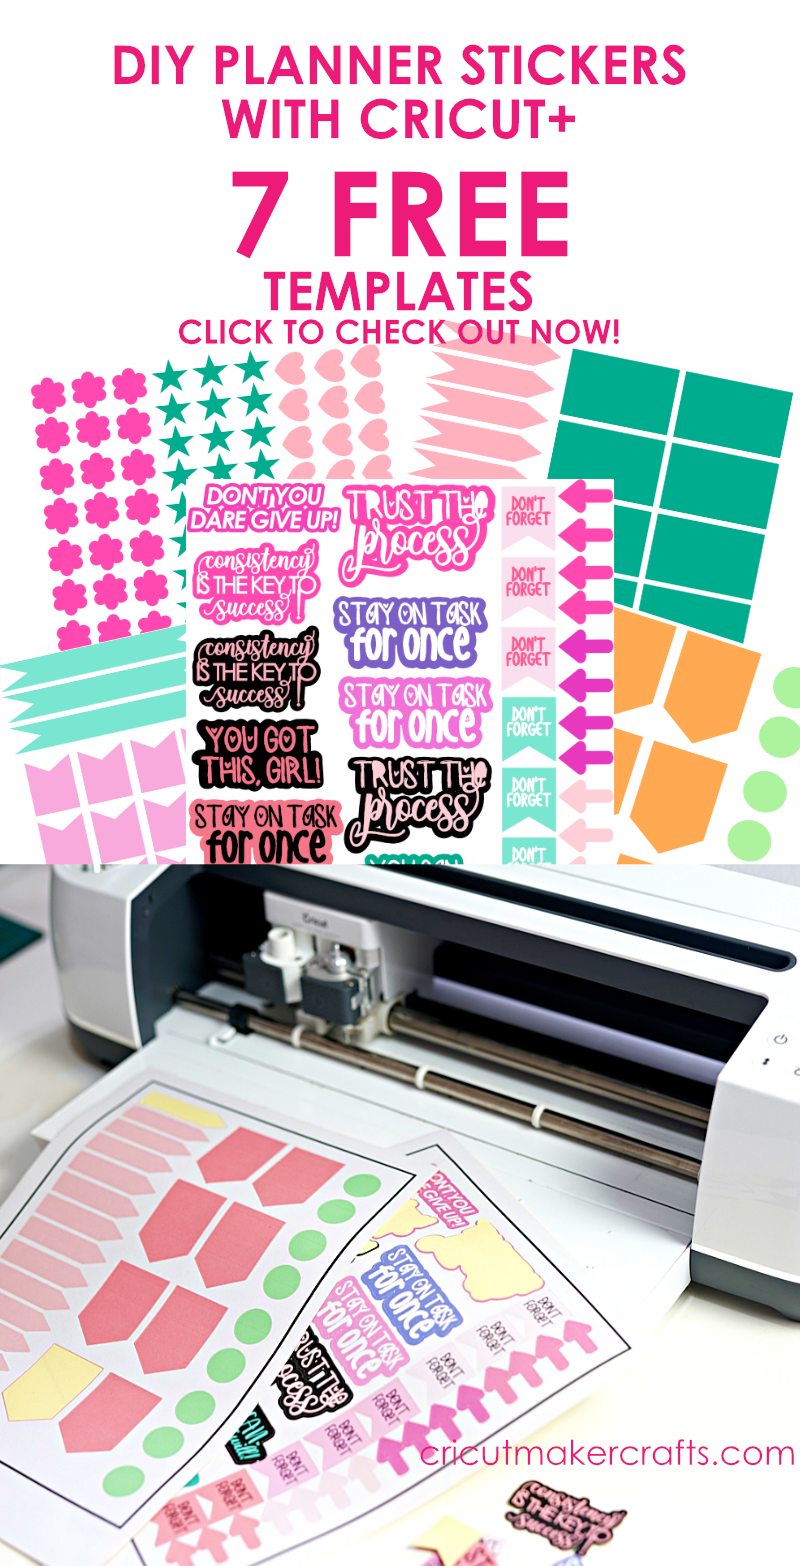
How to Make Planner Stickers with Cricut (7 FREE Templates) -
HOW TO MAKE STICKERS WITH A CRICUT USING PRINT THEN CUT AND ...
How to Print then Cut Stickers on Cricut * Moms and Crafters
Post a Comment for "38 print and cut labels cricut explore air 2"